How to easily receive and decode CubeSat telemetry?

main_tiny

Introduction

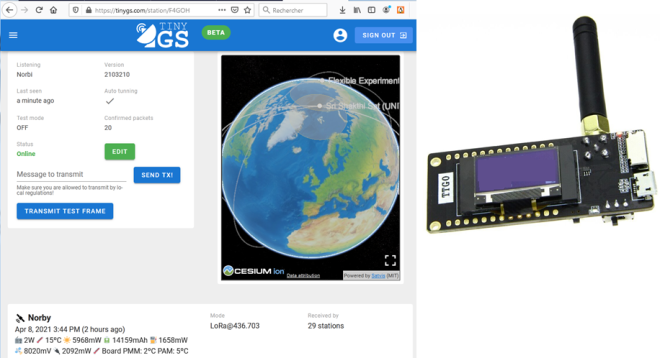
TinyGS is a project facilitating the reception of CubeSat and the decoding of telemetry using LoRa modulation. This project is led by José (G4lile0), Spanish radio amateur. LoRa (Long Range) modulation is based on a spread spectrum transmission widely used in connected objects (IOT: Internet of Things) on 868MHz. This technology competes with Sigfox® in IOT, and is not limited in the size of the packets transmitted.

Lire la suite « How to easily receive and decode CubeSat telemetry? »

How to easily receive and decode CubeSat telemetry?

Receiving radiosondes with MySondy GO

MySondy GO is a project to facilitate the search for Radiosondes in the field. Using a TTGO ESP 32 (433 Mhz) module and a simple smartphone, it is possible to receive the radio signal directly from the probe. The geographical position of the probe is displayed on a map using the smartphone in Bluetooth connection with the module.

Tutorial also in spanish translated by Miguel (ea4bas)

Lire la suite « Receiving radiosondes with MySondy GO »
Receiving radiosondes with MySondy GO

Grove Beginner Kit

Grove Beginner Kit

Most people who want to learn programming on Arduino Uno use tutorials on the internet. These can be blogs or videos. Of course, you will have to buy some material in order to realize small projects that are not too complicated, such as :

  • Blinking a led;
  • Generate a sound;
  • Display text;
  • Perform an action with a push button;
  • Read a temperature, pressure, humidity;
  • Detect a noise;
  • Detect ambient light.

Seeedstudio’s Grove Beginner Kit environment is an « all-in-one » solution with a programming board compatible with an Arduino Uno and a set of sensors and displays already wired. The user only has to concentrate on the programming part while analyzing the links between the microcontroller and the 10 grove peripherals. It only takes a quarter of an hour to carry out the first programming.

Review in english

Review in french

Grove Beginner Kit

Raspberry Pi for HAM Radio

intro

French tutorial link

New : dragon-os (part 16)  spanish available

Introduction

Since 2012, the Raspberry Pi nano computer has become an increasingly important part of the DIY and « maker » community. The increase in power of the Raspberry Pi over the years offers very interesting possibilities for radio amateurs. Indeed, it allows not to permanently monopolize a PC in the decoding of frames with software like WSJT-X, FLDIGI, etc…, without forgetting the possibility to control the Raspberry Pi remotely and thus to be able to work outside the radio shack as I can sometimes do on my couch. Moreover, this nano computer is now widely used in any Hotspot (DMR or D-STAR).

English and spanish tutorial below

Lire la suite « Raspberry Pi for HAM Radio »

Raspberry Pi for HAM Radio

WSPR beacon

dav

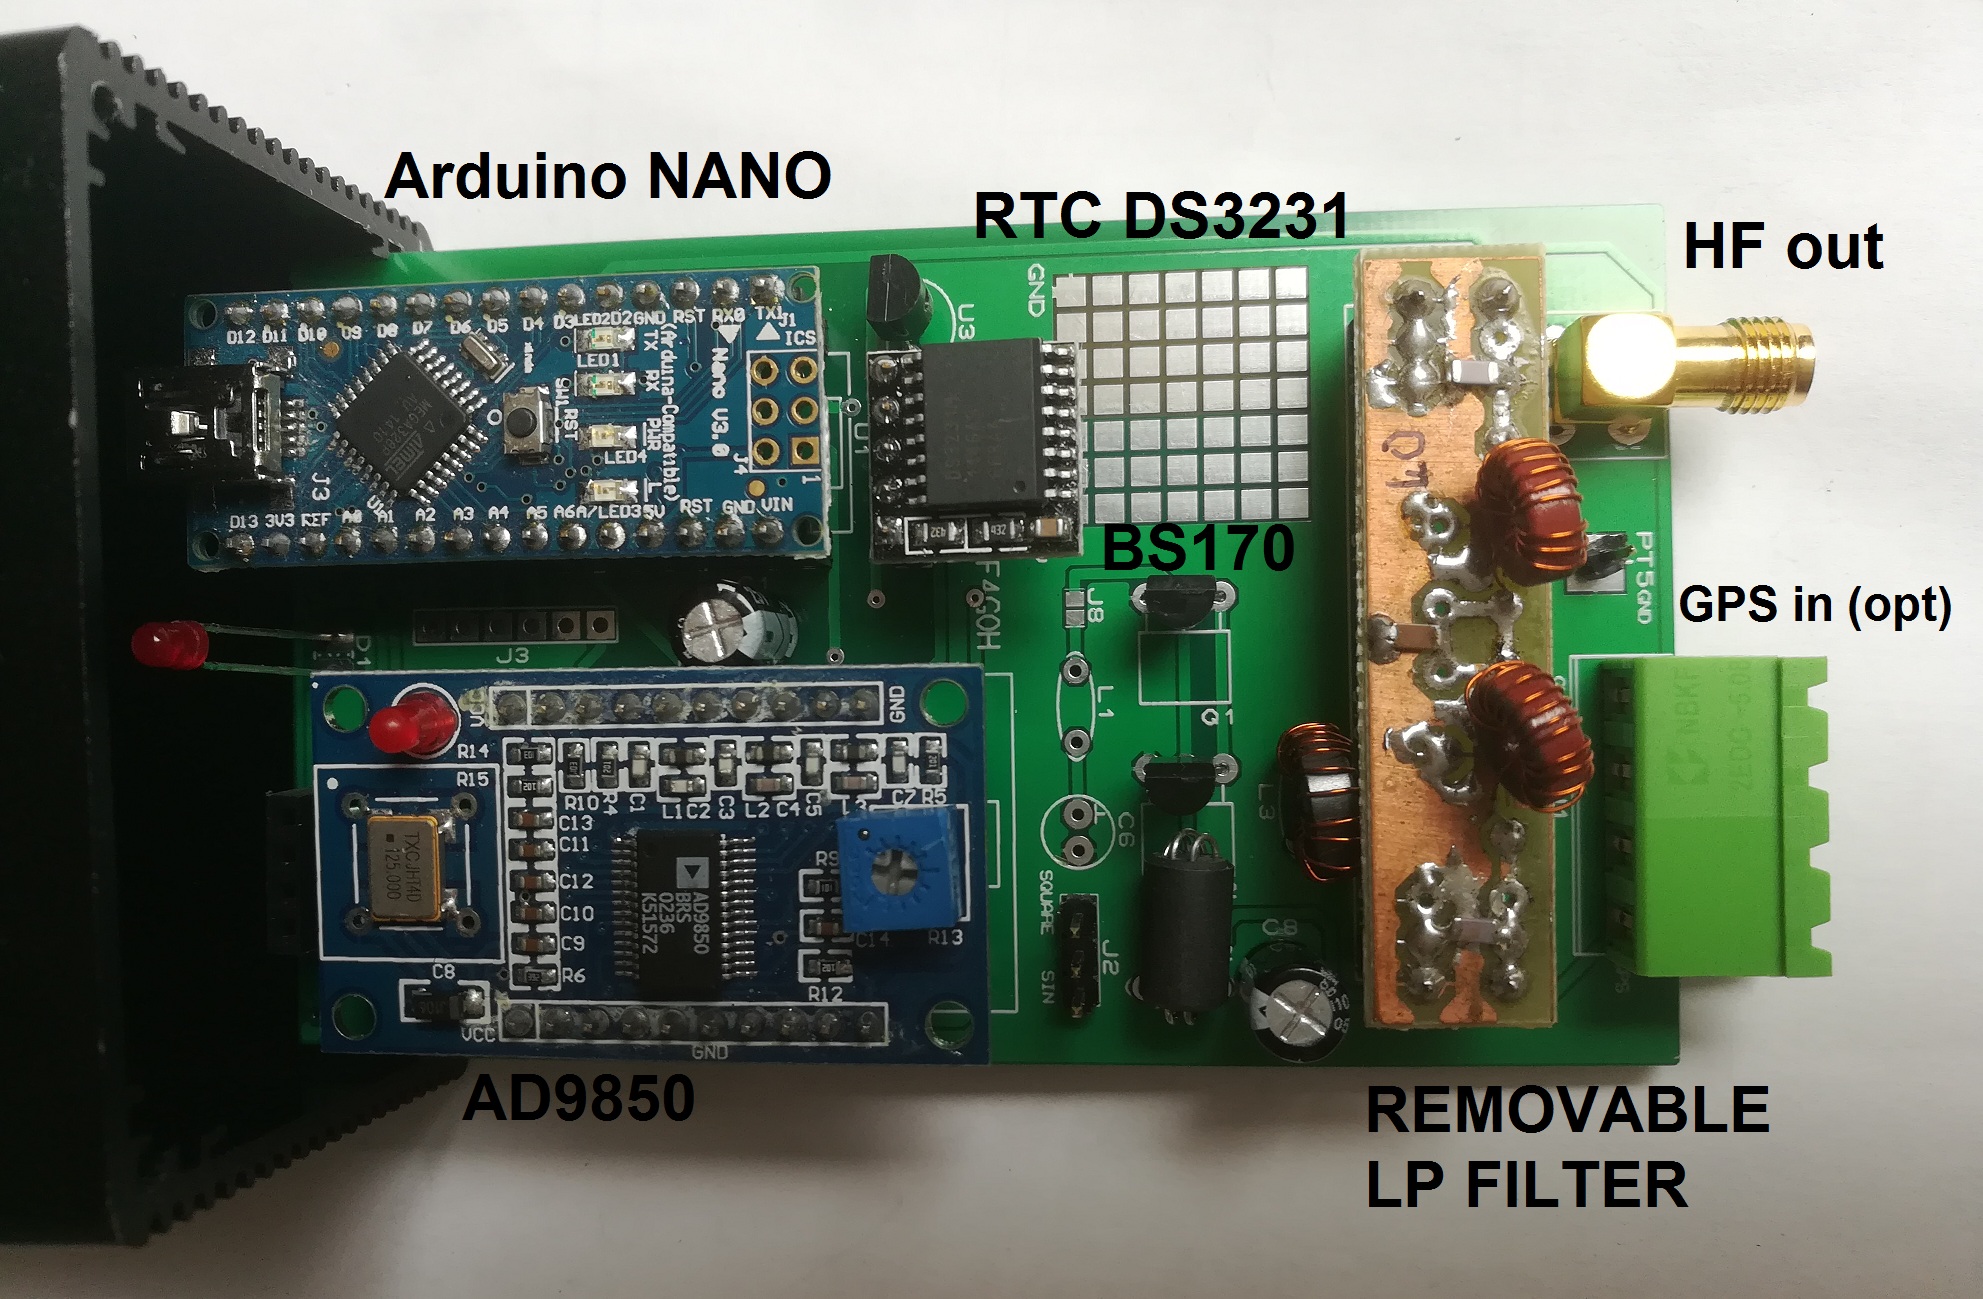
WSPR (pronounced « whisper ») stands for « Weak Signal Propagation Reporter ». It is a protocol, used for weak-signal radio communication. The protocol was designed, and a program written by Joe Taylor, K1JT. This project is a stand alone WSPR beacon complete  and a radio transmitter including low pass filters. The beacon, once configured, will run stand alone transmitting a WSPR sequence each even minute.

WSPR beacon features:

Arduino nano (atmega328P) based microcontroller :

  • Support Arduino IDE 1.0+ (OSX/Win/Linux)
  • Power via USB or External Source + 5v
  • Built-in USB
  • 2 I/O Pins (for GPS receiver)
  • Removable filter
  • AD9850 DDS
  • RTC DS3231
  • BS170 power amplifier 0.1W
  • Fit in Aluminium Instrument Box Enclosure Case 100x66x43
  • Status LED.
  • PCB available (f4goh at orange.fr)
  • diaporamas en français ici
  • wspr ebay links

Lire la suite « WSPR beacon »

WSPR beacon

SigFox IoT tutorial

schema

Bientôt tous les appareils que vous possédez, et pratiquement tous les objets qui existent seront connectés à l’Internet. Que ce soit via votre téléphone portable, des vêtements ou des appareils ménagers, nous serons connectés à l’Internet des objets (IoT). Ce sera probablement des milliards d’IoT d’ici quelques années.

L’objectif du Tutoriel est de mettre en œuvre un module Sigfox 868Mhz et de se familiariser avec la récupération des données.

Document PDF ICI

  • 1 Ou trouver le module ?
  • 2 Utilisation du module
  • 3 Activer le module
  • 4 Amélioration de l’antenne
  • 5 Récupération des données
  • Documentation technique


SigFox IoT tutorial

Digispark Attiny microcontrollers implementation

dav

Introduction

The Digispark is an Attiny85 based microcontroller, and much less well known than Arduino. But considering their price, it seems interesting to learn how to program them.

Digispark microcontrollers features:

Attiny85 based microcontroller (Digispark):

  • Support Arduino IDE 1.0+ (OSX/Win/Linux)
  • Power via USB or External Source – 5v or 12v
  • On-board 500ma 5V Regulator
  • Built-in USB
  • 6 I/O Pins (2 are used for USB only if your program actively communicates over USB, otherwise you can use all 6 even if you are programming via USB)
  • 8k Flash Memory (about 6k after bootloader)
  • 512B EEPROM, 512-Byte SRAM
  • I2C and SPI (vis USI)
  • PWM on 3 pins (more possible with Software PWM)
  • ADC on 4 pins
  • Power LED and Test/Status LEDLF, HF full band.

Attiny167 based microcontroller (Digispark pro):

  • Compatible with Arduino IDE 1.5 (OSX/Win/Linux)
  • USB programming, USB device emulation, USB-CDC virtual serial port emulation
  • 16 Mhz AVR MCU – using a true 16Mhz precision crystal
  • 16KB Flash Memory (14.5K+ after bootloader)
  • 512B EEPROM, 512-Byte SRAM
  • Serial over USB debugging and communication!
  • 14 i/o Pins (2 shared with USB)
  • I2C, true SPI, UART, LIN, and USI
  • ADC on 10 pins
  • 3 PWM Channels (which can be assigned to a selection of pins)
  • Power via USB, or External Source – 5v or 6-16v (automatic selection)
  • On-board button that can be used as a reset, program, or user button – or can be disabled to use that pin as general i/o – without changing the bootloader
  • On-board 500ma 5V regulator
  • Power LED and Test/Status LED (on Pin 1)
    Breadboard compatible pin out/spacing (the three side header pins are only for legacy shield support).

Lire la suite « Digispark Attiny microcontrollers implementation »

Digispark Attiny microcontrollers implementation

Hotspot DMR

dav

Introduction

Réaliser un hotspot DMR…

… le fabriquer ou acheter un montage tout fait ?

Pas facile de s’y retrouver dans la jungle d’Internet. Il faut réaliser très souvent un travail d’enquête minutieuse. Beaucoup de sites proposent une description matérielle, mais le logiciel n’est pas simple. Sans parler de la configuration sur le Raspberry pi qui peut parfois être pénible sans connaitre les lignes de commandes Linux. Ajouter à cela, les liens morts ou des mises à jour qui font que la description est obsolète. Sans oublier le vocabulaire DMR déroutant qui sera lié à un abandon quasi certain.

Avant de se lancer dans le DMR, il vaut mieux avoir une aide extérieure. Une personne connaissant le système et qui pourra vous aider. Combien de fois ai-je pu voir de superbes réalisations, mais impossible à réaliser par manque de description ?

Je vais essayer de faire une synthèse de la mise en œuvre d’un hotspot DMR.

Sommaire :

  • Vocabulaire de base.
  • Le modem.
  • Le Raspberry pi ou l’orange PI.
  • L’écran LCD Nextion
  • La configuration.
  • La programmation du pocket GD-77 * (Custommer Programming Software)
  • Le serveur BrandMeister
  • Conclusion

* Le pocket GD-77 est pris en exemple dans ce document

Fichiers de programmation ici

Lire la suite « Hotspot DMR »

Hotspot DMR

FY 6800 Generator as Beacon

 WSPRnet

Introduction

The FY6800 generator is a good product. Why?

HF full band, schematics, open source code and lot of inputs/outputs to control it.

Just connect an Arduino on TX/RX and Trig/Vco inputs to create BPSK , RTTY, Hellschreiber, CW, WSPR beacon.

FY6800 beacon features:

  • LF, HF full band.
  • Power : 19dbm on 40 meters.
  • Modes : BPSK , RTTY, Hellschreiber, CW, WSPR.
  • Trigger input for FSK modulation.
  • VCO input for FM modulation.
  • Arduino UNO
  • LCD 4×20 display.
  • RTC (for WSPR)
  • Breadboard wiring.

Lire la suite « FY 6800 Generator as Beacon »

FY 6800 Generator as Beacon

Standalone HAM modulation generator

RTTY, Hellschreiber, WSPR, CW, PSK and QPSK 31,63,125

beacon light

Characteristics:

  •    Audio modulation
  •    CIV system control
  •    Avoid using PC
  •    RTC DS3231 (no GPS)
  •    Mode « Standalone »
  •    PTT output (for older TRX)
  •    Cost € 20

The Standalone modulation generator is based on the following components:

  •     Arduino NANO
  •     DS3231 Module
  •     MAX232

Lire la suite « Standalone HAM modulation generator »

Standalone HAM modulation generator